

Posted on September 29th by Colby Stevens
How To Clean Your Wheels and Tires
How To Clean Your Wheels & Tires
INTRODUCTION
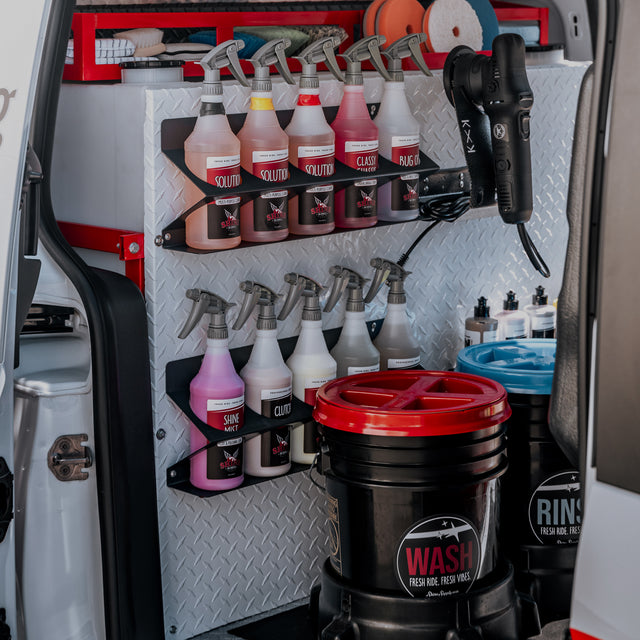
Your wheels and tires take more abuse than any other part of your vehicle. Every drive exposes them to brake dust, road grime, and harsh conditions that leave them looking dull and dirty. Because of this constant punishment, keeping them clean isn’t just about appearance; it’s about protecting your investment and extending the life of your wheels.
In this blog, we’ll break down the proper way to clean your wheels and tires. You’ll learn which cleaners to use for specific finishes, which products to avoid, and how to keep your wheels looking fresh without causing damage.
TUTORIAL VIDEO
If you’re more of a visual learner, this video walks you through the entire process in action; showing you exactly how to properly clean and protect your wheels and tires step by step.
STEP 1: PRE-RINSE
Before applying any cleaner, thoroughly pre-rinse the wheel and tire with water. This step removes loose dirt, brake dust, and road debris sitting on the surface. By rinsing first, you reduce the risk of grinding debris into the wheel finish during the cleaning process which helps prevent scratches and damage to your wheels.
Pro Tip: Never work on a hot wheel. Heat can cause cleaners or water to dry too quickly on the surface, which may lead to staining or etching. Also, always work on one wheel at a time to ensure each wheel gets your full attention and proper care.
STEP 2: APPLICATION
Choosing the right cleaner depends on your wheels’ finish and how much brake dust has built up:
-
Light to Moderate Brake Dust
-
Use Wise Guy Wheel & Tire Cleaner to safely clean both wheels and tires.
-
-
Heavy Brake Dust
-
Use Cool Guy Wheel Cleaner on the wheels and Wise Guy on the tires.
-
Cool Guy is an iron-removing wheel cleaner that attacks stubborn brake dust and removes embedded contaminants Wise Guy alone can’t handle.
-
Safe on all wheel types.
-
-
Polished Aluminum or Anodized Wheels
-
Use Cool Guy on the wheels.
-
Use Solution Multi-Purpose Cleaner (diluted 10:1) on the tires instead of Wise Guy, since Wise Guy is not safe for these finishes.
-
Pro Tip: After spraying your cleaner, foam the wheel with Hot Shot Soap. This extends working time, helps prevent the product from drying, and adds an extra boost of cleaning power.
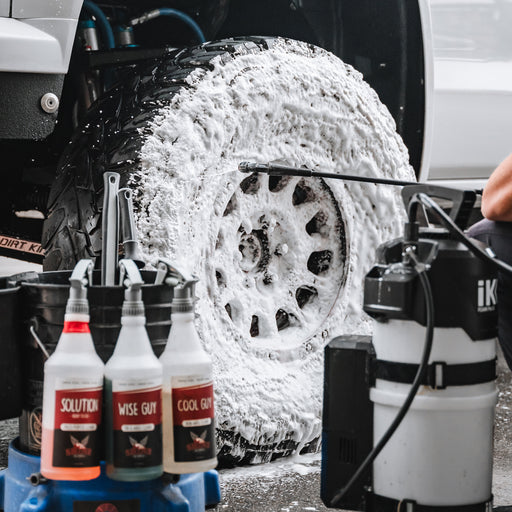
STEP 3: AGITATION (BRUSHING & SCRUBBING)
After applying your wheel and tire cleaner, it’s time to agitate the surfaces with brushes to break down grime and ensure a thorough clean. Using dedicated brushes for each area of the wheel and tire prevents cross-contamination and helps you clean more effectively.
Here’s how we like to break it down:
-
Tires → Use the Detail Factory Tire Brush to scrub deep into the rubber and pull out built-up grime.
-
Wheel Faces → Use the Detail Factory Wheel Face Brush for the spokes and outer surfaces.
-
Wheel Barrels → Use the Detail Factory Barrel Brush to reach deep inside the wheel and clean areas often overlooked.
-
Lug Nuts & Tight Areas → Use the Detail Factory Soft Detail Brush to get into the small crevices that larger brushes can’t reach.
Pro Tip: Always rinse your brushes between passes to preserve the life of your brushes and prevent cross contamination when scrubbing teh next wheel.
Once the wheel is scrubbed, rinse the wheel thoroughly, and move onto the next wheel.
STEP 4: DRESSING THE TIRES
Once your wheels and tires are rinsed and completely clean, it’s time to restore that rich, finished look with a quality tire dressing. This step doesn’t just make the tires look amazing, it conditions the rubber and protects it from fading and cracking.
We recommend using Decked Out Tire Dressing, which can be diluted to match your style:
-
1:1 Dilution → High gloss finish.
-
2:1 Dilution → Satin finish.
Application methods:
-
Low-Profile Car Tires → Spray Decked Out onto a Black Applicator Pad and apply directly to the tire for precision and control.
-
Larger Truck Tires → Spray Decked Out directly onto the tire, let it soak in for 10–15 minutes, then level it out with a Soft Bristle Tire Brush. This ensures a flawless, non-greasy finish that’s dry to the touch.
Pro Tip: Always allow the dressing to fully soak in before driving. This helps prevent sling and ensures the conditioning agents penetrate deep into the tire for longer-lasting results.
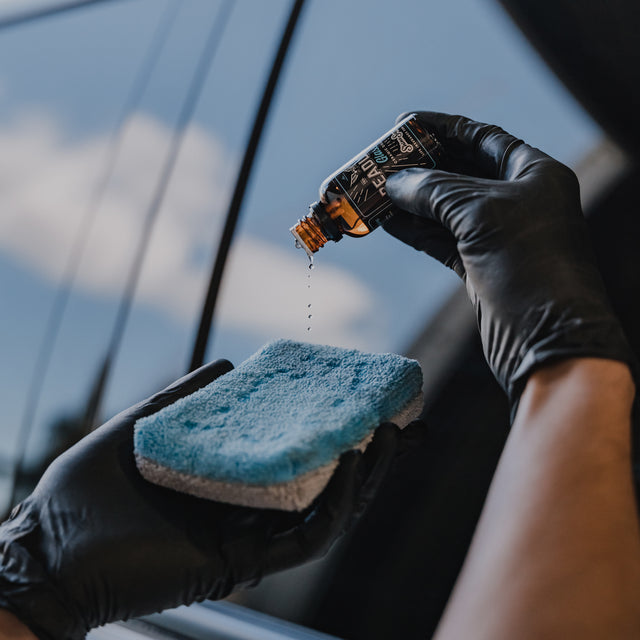
STEP 4: FINISHING TOUCH & PROTECTION
After the tires have been dressed, you may notice a few spots of overspray or light residue left behind from the cleaning process. This is where a good detail spray comes in to perfect the look and add protection.
Grab a Shine Supply detail spray like:
-
Punch-It (ceramic-based) → for long-lasting protection & extreme water beading/slickness.
-
Ride Shine (wax-based) → for a warm, glossy finish with added depth.
Spray directly onto a microfiber towel and wipe down the wheel faces, spokes, and barrels. This final wipe removes any leftover residue while leaving the wheels slick, crisp, and glossy. On top of that, the protective layer makes future washes quicker and easier.
Pro Tip: After cleaning the wheels, while they are still wet, spray Punch-It directly onto the wheel and rinse it off. This delivers instant protection and extreme water beading with zero extra effort.
SUMMARY
Cleaning and protecting your wheels and tires doesn’t have to be complicated. With the right Shine Supply products, you can restore that fresh, detailed look while adding long-lasting protection.
The process is simple:
-
Pre-Rinse your wheels and tires to remove loose debris and prevent scratches.
-
Spray the right cleaner for your wheel type and brake dust level (Wise Guy for light cleaning, Cool Guy for heavy brake dust, Solution for tires with polished/anodized wheels).
-
Agitate with brushes designed for the tires, wheel faces, barrels, and lug nuts to ensure every surface is cleaned safely.
-
Dress the tires with Decked Out Tire Dressing, diluted to your preferred finish, for rich color and lasting conditioning.
-
Perfect and protect the finish with Punch-It or Ride Shine, giving your wheels a slick, glossy look and added UV protection.
Shine Supply’s system keeps your wheels looking new while making them easier to maintain wash after wash.
For any questions about detailing or Shine Supply products, reach out to us at info@shinesupply.com or call 805-535-4332.
